Create a whimsical touch for your space with the Dragonfyre Hanging Plant – a free crochet pattern perfect for plant lovers! Scroll down for the free crochet blanket pattern BELOW!
The Dragonfyre Hanging Plant – Free Crochet Pattern is a simple yet elegant crochet pattern that adds a unique handmade touch to any space. Designed for plant lovers, this pattern creates a stylish hanging holder with long vines perfect for sprucing up your home or making a thoughtful gift, this free crochet pattern is a fun and rewarding project for any skill level. Grab your yarn and get started today!
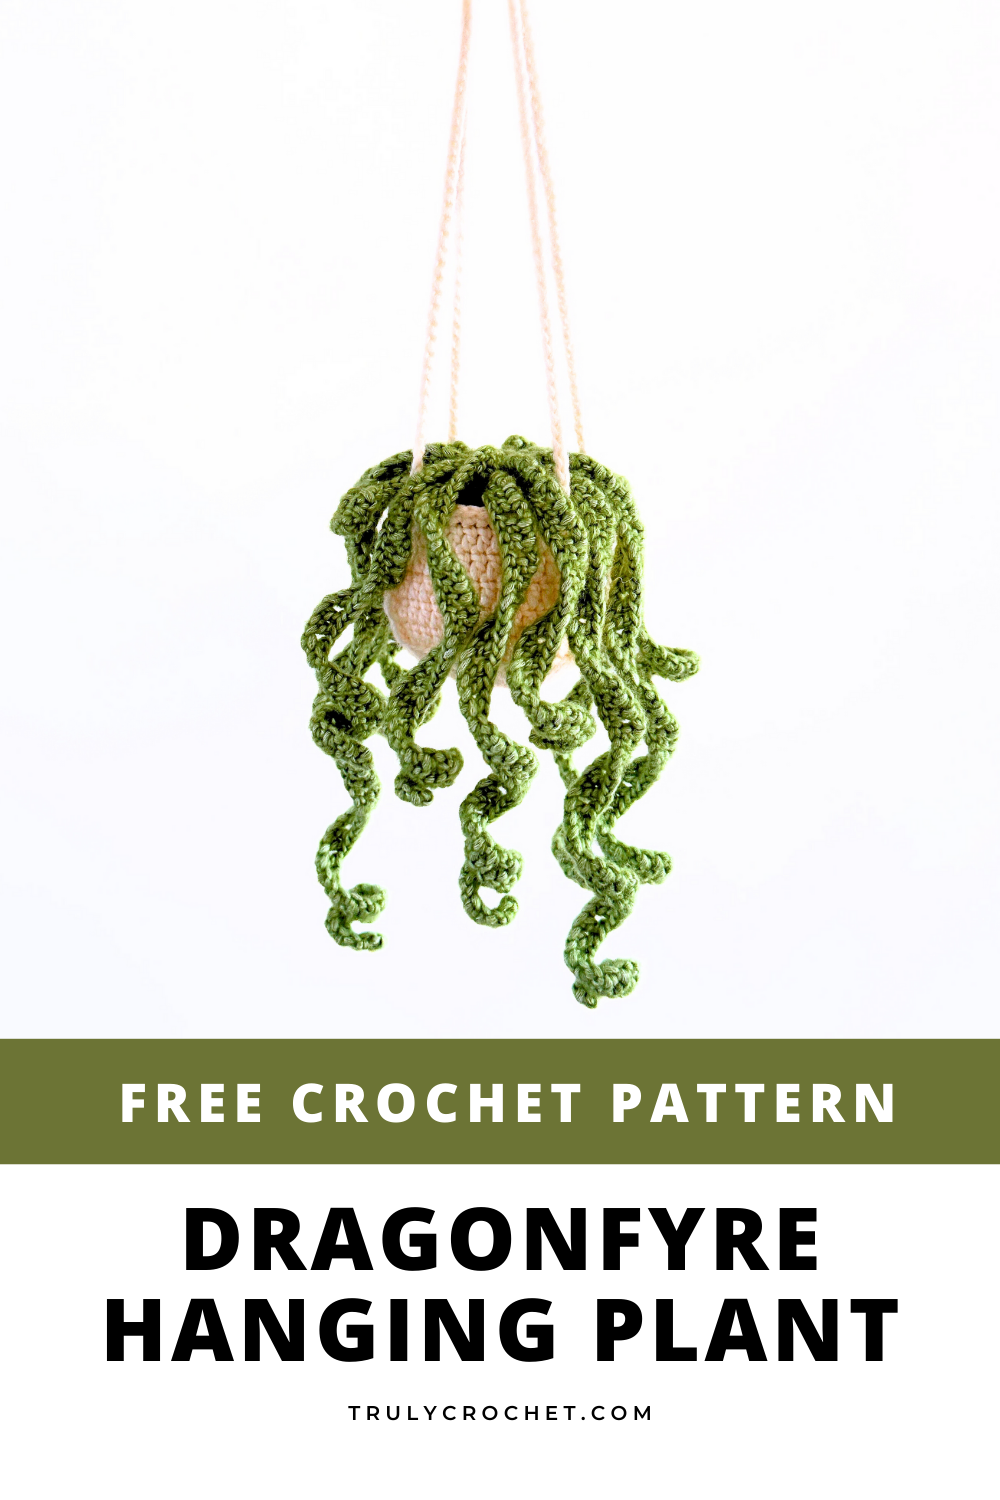
Dragonfyre Hanging Plant – Free Crochet Pattern
Materials Used:
- 3mm Crochet Hook
- Yarnsmiths Pebble Haze Aran – White, dirt color and green
- Yarn Needle
- Tape Measure
- Scissors
- Toy Stuffing
- Stitch Markers
- Hot Glue Gun & Glue Sticks (Optional)
Stitches Used:
- Ch – Chain
- Sc – Single Crochet
- Hdc – Half Double Crochet
- Dc – Double Crochet
- Beg – Beginning
- FLO – Front Loops Only
- BLO – Back Loops Only
- Sts – Stitches
Notes:
-
- This is an intermediate crochet pattern.
- Written using American standard crochet terminology.
- This crochet pattern is worked both in the round and flat.
- The plant pot is worked in the round and then both ties are worked and joined to the plant pot for it to become a plant hanger.
- The vines/leaves are all separate pieces worked flat and then the ends are put through the middle of the dirt and tied at the back to secure.
- The dirt is worked in the round and once the vines/leaves are tied at the back of the dirt, the dirt is then seamed to the plant hanger.
- It’s helpful to use a stitch marker if you struggle to locate the first stitch of each round.
- How to do a magic ring – https://www.youtube.com/watch?v=p298HxgsO1s&t=16s
- If you have stars in your round/row, repeat what is in the stars all the way around/across unless it states otherwise.
- Read each round/row carefully before starting.
Written Instructions:
***Written Instructions and Visual Help available in the PDF versions below***
- Become a All Access Pass Member – Start your 7 day FREE trial today!
- Purchase on Etsy
- Purchase on Ravelry
- Purchase on LoveCrafts
Basket
R1. Create a magic ring, Ch2 (counts as 1dc) Work 11dc in ring, join with a slip stitch to beg dc (12dc)
R2. Ch2 (counts as 1dc from here and throughout unless otherwise stated) Work 2dc in each dc around, join with a slip stitch to beg dc (24dc)
R3. Ch2, 2dc in next dc * 1dc in next dc, 2dc in next dc * Repeat from * to * all the way around, join with a slip stitch to beg dc (36dc)
R4. Ch2, 1dc in next dc, 2dc in next dc * 1dc in next 2dc, 2dc in next dc * Repeat from * to * all the way around, join with a slip stitch to beg dc (48dc)
R5. Ch2, Working in BLO – 1dc in each dc around, join with a slip stitch to beg dc (48dc)
R6-R9. Ch2, 1dc in each dc around, join with a slip stitch to beg dc (48dc)
R10. Ch1 (does not count as a stitch) Working in FLO – 1sc in each dc around, join with a slip stitch to beg sc (48sc)
Do not fasten off. Move on to hanging loops.
Hanging Loops
- Ch80, skip next 23sc around the basket, slip stitch into next sc – Fasten off and weave in ends. One hanging loop complete.
- From the sc stitch you just fastened off in, skip next 11sc around the basket, join yarn in next sc
- Ch80, skip next 23sc around the basket, slip stitch in next sc – Fasten off and weave in ends. Second hanging loop complete.
Dirt
R1. Create a magic ring, Ch2 (counts as 1dc) Work 11dc in ring, join with a slip stitch to beg dc (12dc)
R2. Ch2 (counts as 1dc from here and throughout unless otherwise stated) Work 2dc in each dc around, join with a slip stitch to beg dc (24dc)
R3. Ch2, 2dc in next dc * 1dc in next dc, 2dc in next dc * Repeat from * to * all the way around, join with a slip stitch to beg dc (36dc)
R4. Ch2, 1dc in next dc, 2dc in next dc * 1dc in next 2dc, 2dc in next dc * Repeat from * to * all the way around, join with a slip stitch to beg dc (48dc)
Fasten off leaving a very long tail for seaming, place to one side for later.
Today’s Fresh Crochet Patterns You’ll Love to Try:
- Sleeping Dragon Pattern
- Plush Bunny Pattern
- Granny Stitch Pocket Shawl Pattern
- Baby Bunny Booties Pattern
- Chicken Crochet Pattern
Vines
- Chain 22 and follow the pattern below – You will need 5 of these (21sts)
- Chain 40 and follow the pattern below – You will need 3 of these (39sts)
- Chain 52 and follow the pattern below – You will need 3 of these (51sts)
- Chain 61 and follow the pattern below – You will need 3 of these (60sts)
- Chain 70 and follow the pattern below – You will need 3 of these (69sts)
1sc in 2nd ch from hook, 1sc in next ch (Ch1, skip next ch, 1hdc in next 2 chains) – Repeat what is in the brackets 1 more time
* Ch1, skip next ch, 1dc in next 2 chains * Repeat from * to * all the way across the row until 4 chains remain, ch1, skip next chain, slip stitch into last 3 chains.
Fasten off, do not weave in ends.
Piecing Together
- Grab a couple of different sized vines and with a crochet hook, hook the tails from the vines into the middle of the dirt so they come out the back of the dirt.
- You will keep following the above until all vines are in the middle of the dirt – The right side will have the vines and the wrong side will have the tails.
- Once you are happy with how the vines will sit on the dirt, tie all the ends together into a knot, you can do small knots, one big knot or two knots.
- You can use your hot glue gun here if you would like to secure even further.
- Place some toy stuffing into the hanging basket but don’t overfill.
- Using the very long tail from the dirt and a yarn needle, you will attach the dirt to the hanging basket by going in and out of the visible back loop stitches from row 10 of the basket and going through all the stitches on the dirt.
- Once the dirt and the basket are completely secure to each other, fasten off and weave in ends.
Finishing
Move your vines evenly around the hanging loops. Hope you love your new hanging plant!
Where To Next?
- You can find my other free crochet blanket patterns here.
- Pin this post: Save this tutorial to your Pinterest boards so that you can come back to it later.
- Leave a comment: Leave a comment below, we love to hear your feedback!
- Share on Instagram: When you make this project, share it on social media and tag me @trulycrochet. We love to see what you are currently making!
Terms Of Use:
These Terms of Use apply to all the patterns and tutorials made by Truly Crochet. All of the patterns and tutorials are for personal use only and belong to Truly Crochet.
- You are not allowed to copy, reproduce, adjust, distribute or sell Truly Crochet patterns and tutorials in whole or in part.
- You are not allowed to distribute and/or sell the translations of Truly Crochet patterns and tutorials in whole or in part.
- You can sell finished items made using Truly Crochet patterns, however, you have to give credit to Truly Crochet for the actual design.
- You are not allowed to use Truly Crochet photos without written permission.
- You are not allowed to copy and paste Truly Crochet patterns or tutorials to social media or anywhere else in whole or in part.
- If you would like to share the patterns, you can give a link to the Truly Crochet website www.trulycrochet.com.
