The Daisy Tapestry – Free Crochet Pattern is a delightful adventure for advanced beginners looking to blossom in their crochet journey!
See the full FREE crochet pattern BELOW (scroll down) or you may choose to purchase the ad free printable from my Etsy shop HERE.
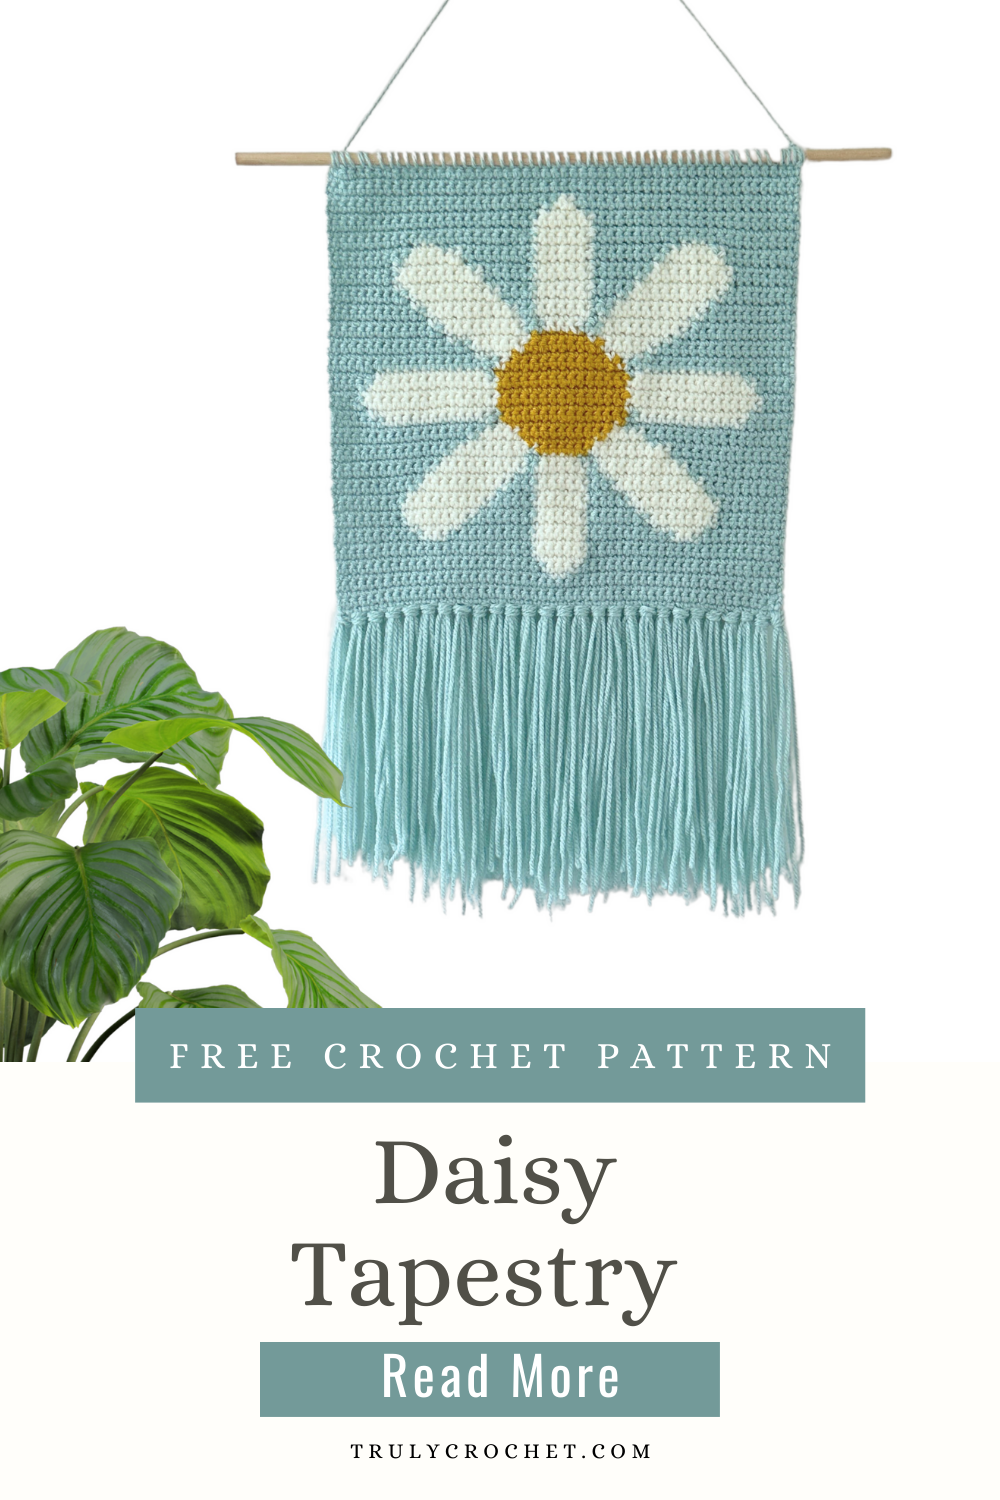
The Daisy Tapestry – Free Crochet Pattern is a delightful adventure for advanced beginners looking to blossom in their crochet journey! This free pattern brings the cheerful charm of daisies to life, letting you create a vibrant, floral masterpiece. With its playful mix of color changes and easy-to-follow stitches, it’s a great way to sharpen your skills while adding a touch of springtime to your home decor. Perfect for brightening up any space, this tapestry crochet project is a fun and creative way to let your crochet skills bloom!
Daisy Tapestry – Free Crochet Pattern
Join Our All Access Pass
Unlock endless creativity by joining the Truly Crochet All Access Pass for only $3.99 a month, where you’ll dive into a colorful world of tapestry crochet patterns, turning yarn into stunning works of art with every stitch!
- Written Instructions – US crochet terminology used.
- Number Blocks – Quicker way to crochet your tapestry.
- Chart – Best viewed on a device.
ALSO INCLUDES
- How to use the number blocks – Example included.
- How to change colors – Links to YouTube.
- How to attach the fringe.- Pictures Included.
- How to attach the wooden dowel – Pictures Included.
- How to block your tapestry.
7 DAY FREE TRIAL – Join today and let your crochet tapestry journey blossom with Truly Crochet!
Supplies You Will Need:
- 4mm Crochet Hook
- Stylecraft Special Aran – White, Duck Egg & Mustard
- Yarn Needle
- Tape Measure
- Scissors
- Steamer / Steam Iron
- Wooden Dowel
Size 12.25 x 19 inches approx including fringe
Stitches Used:
Ch – Chain
Sc – Single Crochet
WS – Wrong Side
RS – Right Side
Written In:
This pattern is written using American standard crochet terminology.
Notes:
- All stitches will be done in single crochet (Sc).
- Ch1 at the start of each row does NOT count as a stitch.
- This pattern is worked in rows starting from the bottom working to the top.
- Turn your work at the end of each row.
- Odd number rows is the right side of your work.
- Even number rows are the wrong side of your work.
- You can use either tapestry crochet or intarsia crochet for the color changes.
- There are 3 different ways you can crochet this piece by using:
+ Written Instructions – Free Version Below
+ Chart – Paid Version
+ Number Blocks – Paid Version
- Read each row carefully before starting the round.
Let’s get to the pattern!
Grab the premium versions here which include CHART, NUMBER BLOCKS AND WRITTEN INSTRUCTIONS!
Fringe:
- In duck egg color cut 12 inch pieces of yarn – You will need 3 strands of yarn to complete one fringe, I placed them evenly across the row.
- Starting from the far left foundation chain, insert your hook in to the chain stitch from back to front.
- Fold 3 strands of yarn in half to make a loop and pull through stitch.
- This is what it should look like once you have pulled some of the loop through.
- Pull all the ends through the loop and pull tight.
Move on to blocking.
Blocking:
Your tapestry piece can look uneven and may not lay completely flat which is perfectly normal with tapestry crochet.
The best way to sort this out is to block your work!
Steam – Pin your tapestry piece down on to blocking mats and use a hand steamer to reshape. Or you can use the steam function on your iron.
Water – Submerge tapestry piece in cool water for approx 5-10 mins then lay flat, you can reshape whilst wet, pin on to blocking mats and let it dry completely.
Spray – Spray both sides of your tapestry piece with water so it’s nice and damp, you can reshape whilst damp, pin on to a blocking board and let it dry completely.
Once it is completely dry and blocked move on to attaching your dowel.
Dowel Rod:
- Using the long tail you left earlier and a darning needle, wrap around wooden dowel and then back through the next stitch and repeat this all the way across until the wooden dowel is completely attached to the tapestry.
- Once the dowel is completely attached to your wall hanging you will need to cut another long piece of yarn, this will be to attach to your wooden dowel so you can hang your tapestry up – this can be whatever size you would prefer.
- Wrap the one end of your yarn over twice on one side of the dowel where the wall hanging starts and tie a knot.
-
Then wrap the other end of the yarn over twice on the other side of the dowel where the wall hanging ends and tie a knot leaving slack in the middle to hang up your wall hanging.
-
Trim any ends -you will be able to see on the picture above one of the knots
More Crochet Tapestry Patterns
If you liked this crochet tapestry, you might be interested in these related crochet tapestry patterns:
WHERE TO NEXT?
Pin this post: Save this tutorial to your Pinterest boards so that you can come back to it later.
Leave a comment: Leave a comment below, we love to hear your feedback!
Share on Instagram: When you make this project, share it on social media and tag me @trulycrochet. We love to see what you are currently making!
TERMS OF USE:
These Terms of Use apply to all the patterns and tutorials made by Truly Crochet. All of the patterns and tutorials are for personal use only and belong to Truly Crochet.
- You are not allowed to copy, reproduce, adjust, distribute or sell Truly Crochet patterns and tutorials in whole or in part.
- You are not allowed to distribute and/or sell the translations of Truly Crochet patterns and tutorials in whole or in part.
- You can sell finished items made using Truly Crochet patterns, however, you have to give credit to Truly Crochet for the actual design.
- You are not allowed to use Truly Crochet photos without written permission.
- You are not allowed to copy and paste Truly Crochet patterns or tutorials to social media or anywhere else in whole or in part.
- If you would like to share the patterns, you can give a link to the Truly Crochet website www.trulycrochet.com.

