The Easy Crochet Christmas Tree – Free Crochet Pattern is the perfect project to add handmade charm to your holiday season! Scroll down for the FREE granny square pattern.

About The Easy Crochet Christmas Tree:
The Easy Crochet Christmas Tree – Free Crochet Pattern is the perfect project to add handmade charm to your holiday season! Designed for advanced beginners, this free pattern offers a delightful way to craft festive décor that’s both simple and eye-catching. Whether you’re creating ornaments, garlands, or tabletop displays, these cute crochet trees bring a cozy, personalized touch to your celebrations. Quick to make and endlessly customizable with colors and embellishments, this project is a fantastic way to sprinkle a little holiday cheer into your crochet lineup.
Exciting Crochet Patterns To Try This Week:
- Rainforest Scarf Pattern
- Into The Woods Cowl Pattern
- Cozy Days Daisy Blanket Pattern
- Cute Loaf Cat Plushies Pattern
- Chunky Evergreen Throw pattern
Easy Crochet Christmas Tree – Free Crochet Pattern
Supplies You Will Need:
- 4.5mm Crochet Hook
- Yarnsmiths Pebble Haze Aran – Scrap yarn used
- Yarn Needle
- Tape Measure
- Scissors
Written Instructions for the Easy Crochet Christmas Tree:
- Save this tutorial to your Pinterest crochet board here.
Stitches Used:
Ch – Chain
Sc – Single Crochet
Dc – Double Crochet
Dc2tog – Double Crochet 2 Together
Sts – Stitches
Written In:
This pattern is written using American standard crochet terminology.
Notes:
- This pattern is written using American standard crochet terminology.
- This crochet pattern is worked in 3 parts – tree body, star, tree stump and then sewn together.
- Ch1 at the start of row each row does not count as a stitch throughout the pattern unless otherwise stated.
- Read each row carefully before starting the round.
Let’s get to the pattern!
Need visual help?
- Etsy
- Ravelry
- LoveCrafts
Tree Body – Green Yarn:
R1. Ch16, 1dc in 2nd ch from hook and in each chain across, turn (15dc)
R2. Ch1, dc2tog over first 2sts, 1dc in each st across until last 2sts, dc2tog over last 2sts, turn (13sts)
R3-R7. Repeat row 2
Row 3 = 11sts
Row 4 = 9sts
Row 5 = 7sts
Row 6 = 5sts
Row 7 = 3sts
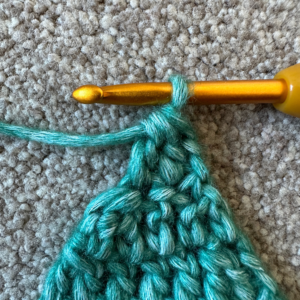
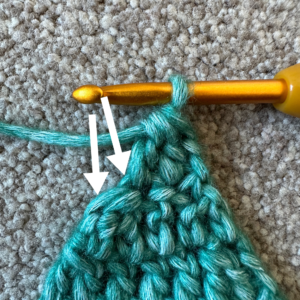
R8. Ch1, dc2tog over first 2sts as seen in the picture below. You will then have one stitch remaining.


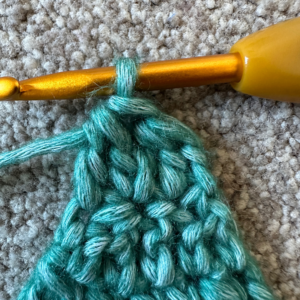
R9. Ch1, dc2tog over last 2sts.
Fasten off and weave in ends.
Star – White Yarn:
R1. Leave a tail for attaching to the tree body – Create a magic ring, Ch1 (does not count as a stitch) or Ch4, join with a slip stitch to beg ch to form a ring
Work (1sc, 1dc, ch1, 1dc) in ring – Repeat 4 more times, join with a slip stitch to beg sc, slip stitch into first ch1 space
Fasten off and attach to the top of the Christmas tree body.
Tree Stump – Mocha Yarn:
R1. Ch5, 1dc in 2nd ch from hook and in each ch across, turn (4dc)
R2. Ch1, 1dc in each dc across (4dc)
Fasten off and weave in ends.
Attach the tree stump to the bottom of your tree, i hid row 2 of the tree stump behind the tree and used the same color yarn i used for the tree to attach the tree stump so it was seamless.
Weave in any remaining ends. Move on to blocking.
Blocking
Blocking will make your work lay flat and even! Here are some easy and effective methods to try:
- Wet Blocking: Soak in water, gently shape it, and pin it down on a blocking mat until dry. It’s like giving your work a spa day!
- Steam Blocking: Use a steamer or iron to lightly steam your work while it’s pinned, watching the stitches pop into place.
- Spray Blocking: Mist your work with water, pin it to shape, and let it air dry for a fresh, crisp finish.
Each method helps ensure your work is even, making your final project look amazing!
WHERE TO NEXT?
Pin this post: Save this to your Pinterest boards so that you can come back to it later.
Leave a comment: Leave a comment below, we love to hear your feedback!
Share on Instagram: When you make this project, share it on social media and tag me @trulycrochet. We love to see what you are currently making!
TERMS OF USE:
These Terms of Use apply to all the patterns and tutorials made by Truly Crochet. All of the patterns and tutorials are for personal use only and belong to Truly Crochet.
- You are not allowed to copy, reproduce, adjust, distribute or sell Truly Crochet patterns and tutorials in whole or in part.
- You are not allowed to distribute and/or sell the translations of Truly Crochet patterns and tutorials in whole or in part.
- You can sell finished items made using Truly Crochet patterns, however, you have to give credit to Truly Crochet for the actual design.
- You are not allowed to use Truly Crochet photos without written permission.
- You are not allowed to copy and paste Truly Crochet patterns or tutorials to social media or anywhere else in whole or in part.
- If you would like to share the patterns, you can give a link to the Truly Crochet website www.trulycrochet.com.
I hope you love your new granny square, have fun crocheting!
Clare x
