The Merry Granny Square – Free Crochet Pattern puts a festive and textured twist on the beloved classic granny square! Scroll down for the FREE granny square pattern.
About The Merry Granny Square:
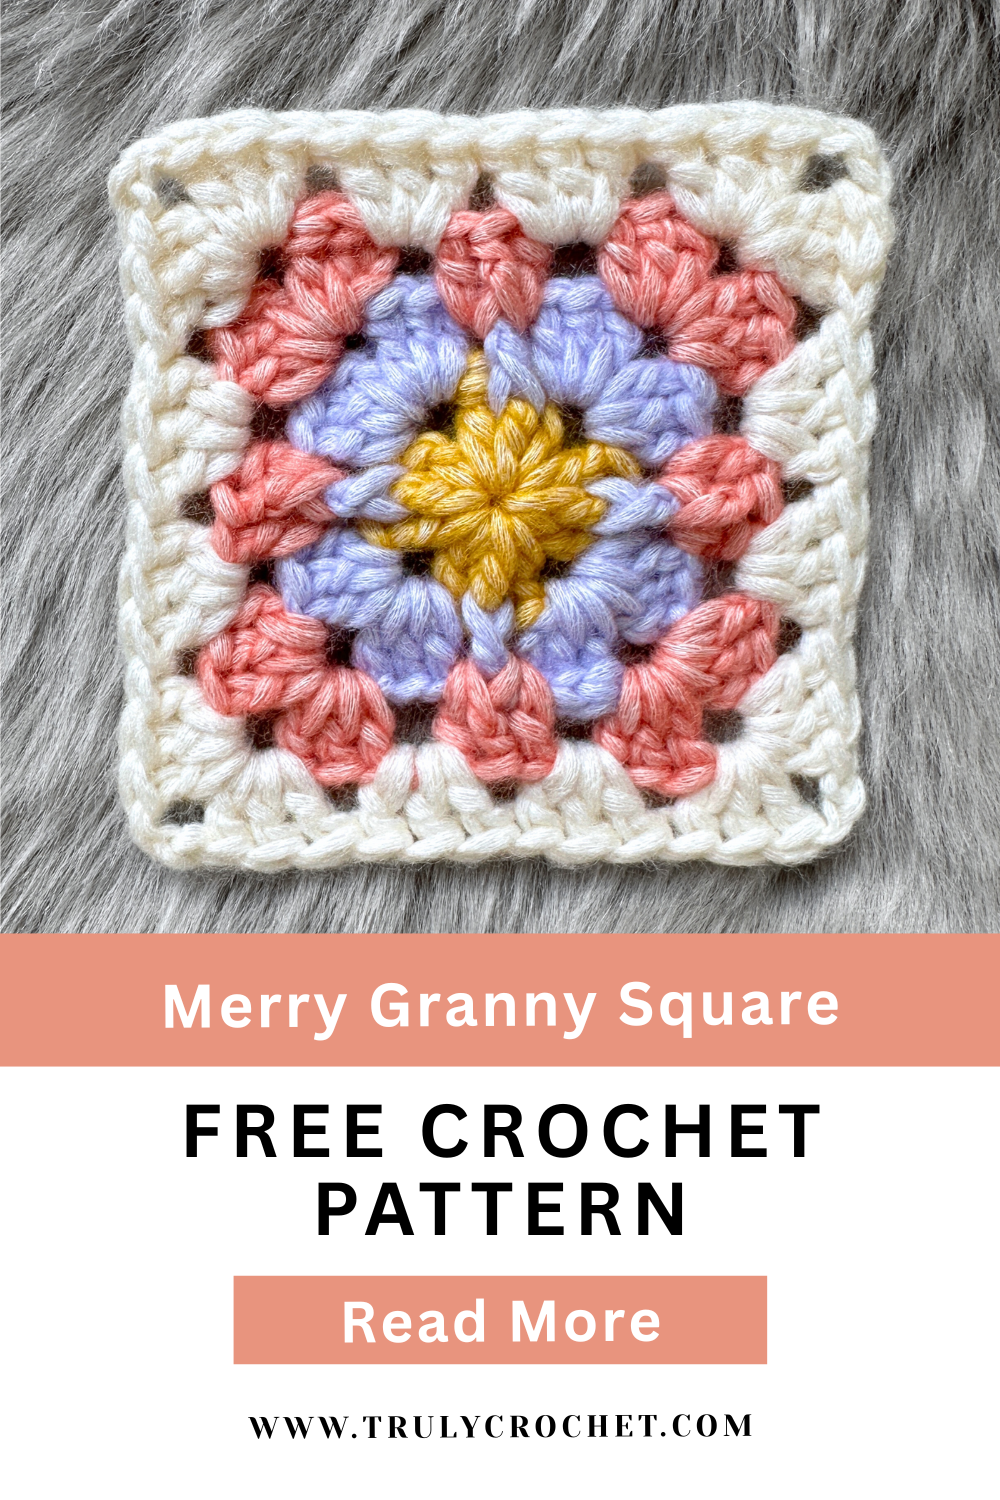
The Merry Granny Square – Free Crochet Pattern puts a festive and textured twist on the beloved classic granny square! While it keeps the familiar layout we all love, rounds 2 and 3 feature a sprinkle of front post double crochet (fpdc) stitches to add a fun pop of texture and depth. This subtle variation creates a playful, eye-catching design that works beautifully in any color combo. Whether you’re making a cheerful blanket, a textured pillow, or a creative patchwork project, the Merry Granny Square – Free Crochet Pattern is a joyful addition to your crochet lineup which is quick to make, easy to customize, and full of merry charm!
Merry Granny Square – Free Crochet Pattern
Supplies You Will Need:
- 5mm Crochet Hook
- Any Aran Yarn in 4 colors – Exact yarn used in paid version, here!
- Yarn Needle
- Tape Measure
- Scissors
Stitches Used:
- Ch – Chain
- Dc – Double Crochet
- Fpdc – Front Post Double Crochet
- Sts – Stitches
- Beg – Beginning
Stitch Breakdown:
Fpdc – Front Post Double Crochet
- Yarn over, Insert hook from the front to back of your project by going behind the post of the stitch and back out the front on the other side of the post.
- Yarn over, pull up a loop (3 loops on your hook).
- Yarn over and pull through two loops on your hook (2 loops on your hook).
- Yarn over and pull through the remaining two loops on your hook.
Size:
3.5 inches approx after blocking
Written In:
This pattern is written using American standard crochet terminology.
Notes:
- This crochet pattern is worked in the round.
- Repeat what is in between the stars from * to * until the end of the round.
- If you have a ** in your row you need to follow the pattern from * to * all the way around and then when you get near the end of the round you will finish your last repeat at ** because you can no longer complete the entire repeat, then follow what it says to do to complete the round.
- Read each row carefully before starting the round.
Let’s get to the pattern!
Want this AD free with visual help? You can find them in the PDF’s below:
- All Access Pass Membership
- Etsy
- Ravelry
- LoveCrafts
R1. Make a magic ring or ch4, join with a slip stitch to beginning ch to form a ring, ch1 (does not count as a stitch) (Work (3dc, ch2) in ring – Repeat 3 more times, join with a slip stitch to beg dc, slip stitch into next ch2 space, fasten off
R2. Join yarn in any ch2 space, ch2 (counts as 1dc) Work (2dc, ch2, 3dc) in same ch2 space, skip next dc, fpdc around next dc, skip next dc * Work (3dc, ch2, 3dc) in next ch2 space, skip next dc, fpdc around next dc, skip next dc * Repeat from * to * all the way around, join with a slip stitch to beg dc, slip stitch into next ch2 space, fasten off
R3. Join yarn in any ch2 space, ch2 (counts as 1dc) Work (2dc, ch2, 3dc) in same ch2 space, skip next 3dc, 1dc in space before the fpdc, fpdc around fpdc, 1dc in space after the fpdc, skip next 3dc * Work (3dc, ch2, 3dc) in next ch2 space, skip next 3dc, 1dc in space before the fpdc, fpdc around fpdc, 1dc in space after the fpdc, skip next 3dc * Repeat from * to * all the way around, join with a slip stitch to beg dc, slip stitch into next ch2 space, fasten off
R4. Join yarn in any ch2 space, ch2 (counts as 1dc) Work (2dc, ch2, 3dc) in same ch2 space, skip next 3dc, 3dc in space before the next dc, skip these next sts: (dc, fpdc, dc) 3dc in space after the dc, skip next 3dc * Work (3dc, ch2, 3dc) in next ch2 space, skip next 3dc, 3dc in space before the next dc, skip these next sts: (dc, fpdc, dc) 3dc in space after the dc, skip next 3dc * Repeat from * to * all the way around, join with a slip stitch to beg dc, slip stitch into next ch2 space, fasten off
Weave in all ends. Move on to blocking.
BLOCK
Your granny square can look uneven and may not lay completely flat which is perfectly normal so it is best to block your granny square.
OTHER GRANNY SQUARE PATTERNS
WHERE TO NEXT?
Pin this post: Save this to your Pinterest boards so that you can come back to it later.
Leave a comment: Leave a comment below, we love to hear your feedback!
Share on Instagram: When you make this project, share it on social media and tag me @trulycrochet. We love to see what you are currently making!
TERMS OF USE:
These Terms of Use apply to all the patterns and tutorials made by Truly Crochet. All of the patterns and tutorials are for personal use only and belong to Truly Crochet.
- You are not allowed to copy, reproduce, adjust, distribute or sell Truly Crochet patterns and tutorials in whole or in part.
- You are not allowed to distribute and/or sell the translations of Truly Crochet patterns and tutorials in whole or in part.
- You can sell finished items made using Truly Crochet patterns, however, you have to give credit to Truly Crochet for the actual design.
- You are not allowed to use Truly Crochet photos without written permission.
- You are not allowed to copy and paste Truly Crochet patterns or tutorials to social media or anywhere else in whole or in part.
- If you would like to share the patterns, you can give a link to the Truly Crochet website www.trulycrochet.com.
I hope you love your new granny square have fun crocheting!
Clare x

