Filet crochet is another type of crochet where you create ‘blocks’ and ‘spaces’ and in all this creates beautiful crochet patterns depending where you put your ‘blocks’ and where you put your ‘spaces’ you can design beautiful things.
Blocks:
Blocks are normally made up of 4dc stitches or they can be made up of 3dc, 2dc and even 1dc stitch but for my blanket patterns i use the old fashioned 4dc filet method and this is the most popular out of them all.
Spaces:
Your spaces are your ch2’s and this will give it a mesh look by normally skipping 2dc stitches.
Instructions and Charts:
Usually with filet crochet you just follow a chart and have no written instructions which i will be honest is not for everyone and not everyone will completely understand filet crochet so they prefer written instructions to be able to complete a filet crochet pattern, in my blanket patterns i offer the written instructions for free and then in the paid version i offer charts. My charts can also help you make your blanket larger as you can actually see on the chart where ‘blocks’ and ‘spaces’ are.
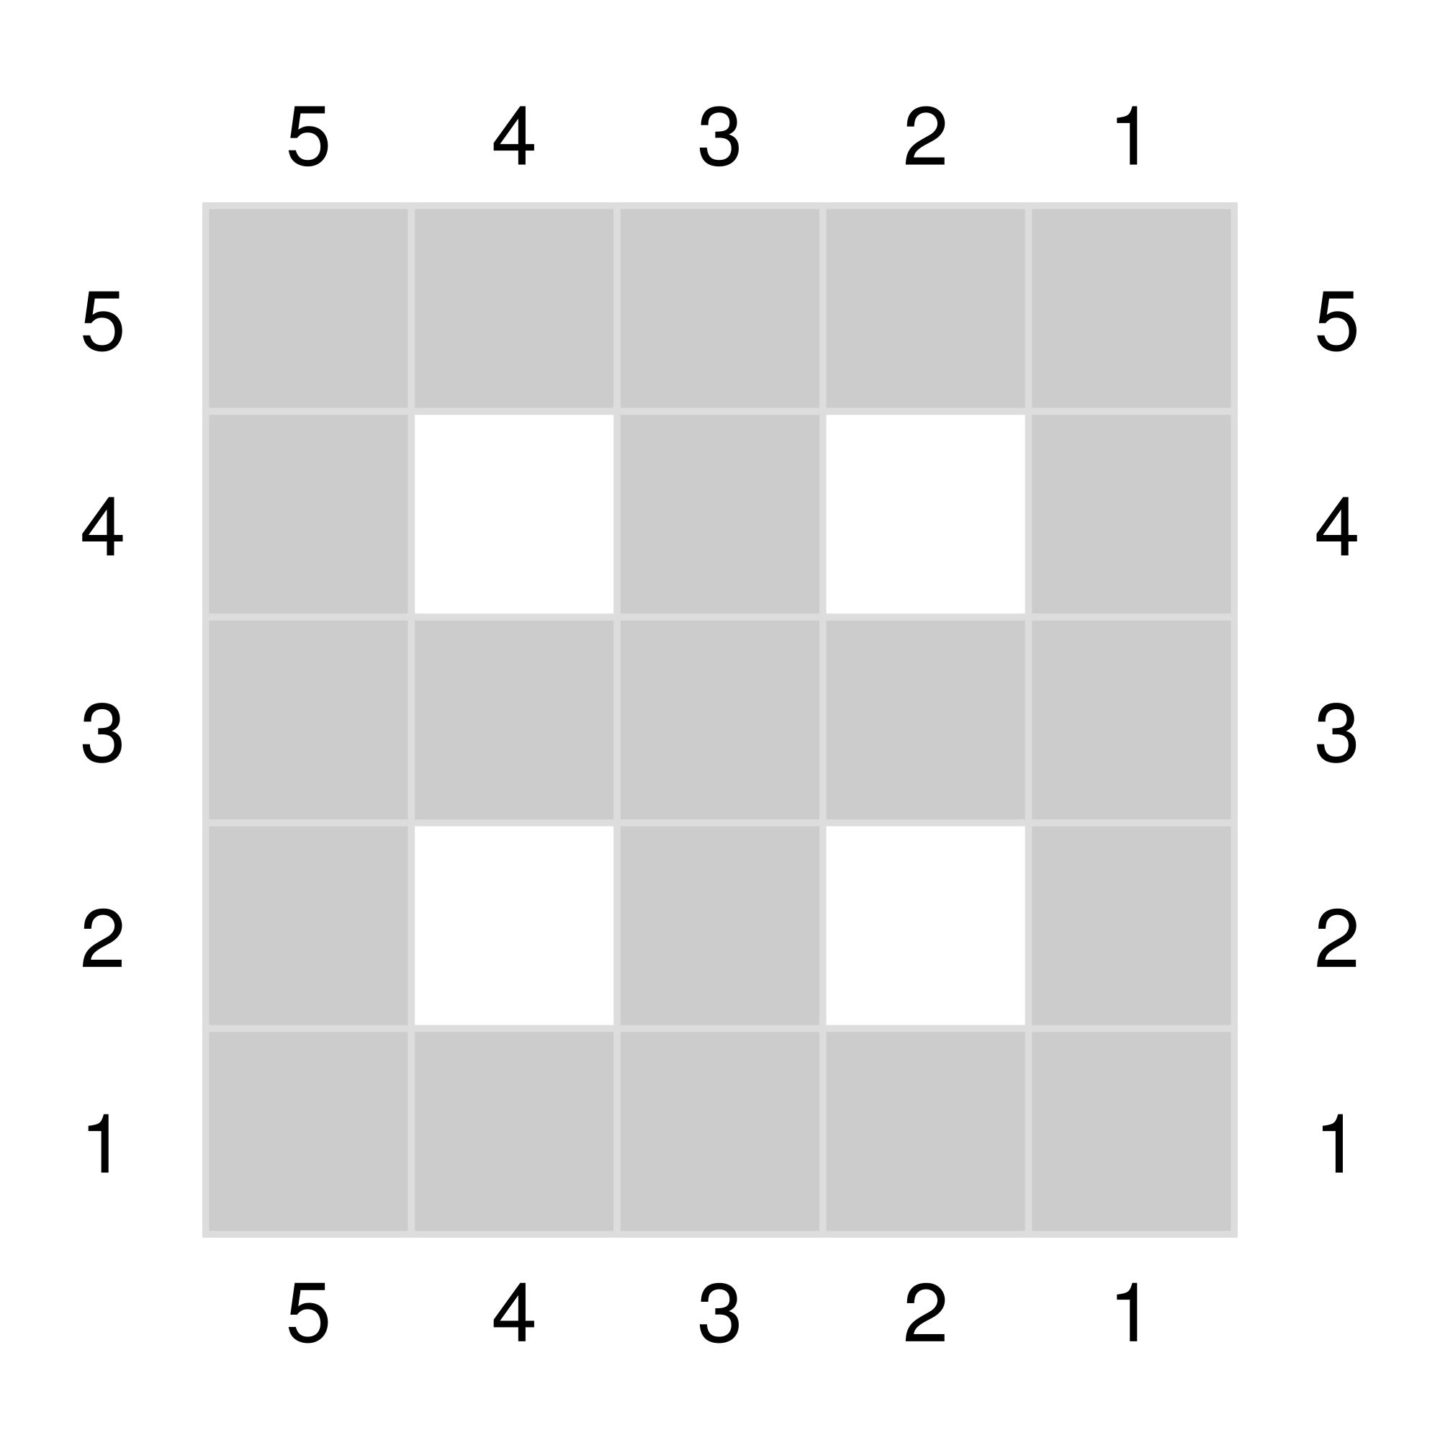
The numbers going up the sides of the charts are your rows – for all odd rows you read them right to left and all even rows you read them left to right.
The numbers going along the bottom of my charts is to help the more advanced crocheter if they wanted to make their blanket larger. So if you are a beginner crocheter or are just learning about filet crochet ignore the numbers going along the bottom for the time being, if you are ready to learn more about that then keep reading and the information will be under Making Patterns Larger.
4dc Filet:
As i mentioned earlier this is the method i use for my filet crochet blanket patterns other designers may do it slightly differently, i will try and explain this as simple as possible.
Each single ‘block’ consists of 4dc, if you had two ‘blocks’ next to each other they will share a dc in the center which means there would be 7dc in that group of two ‘blocks’, if you had three ‘blocks’ next to each other in a row you would have 10dc
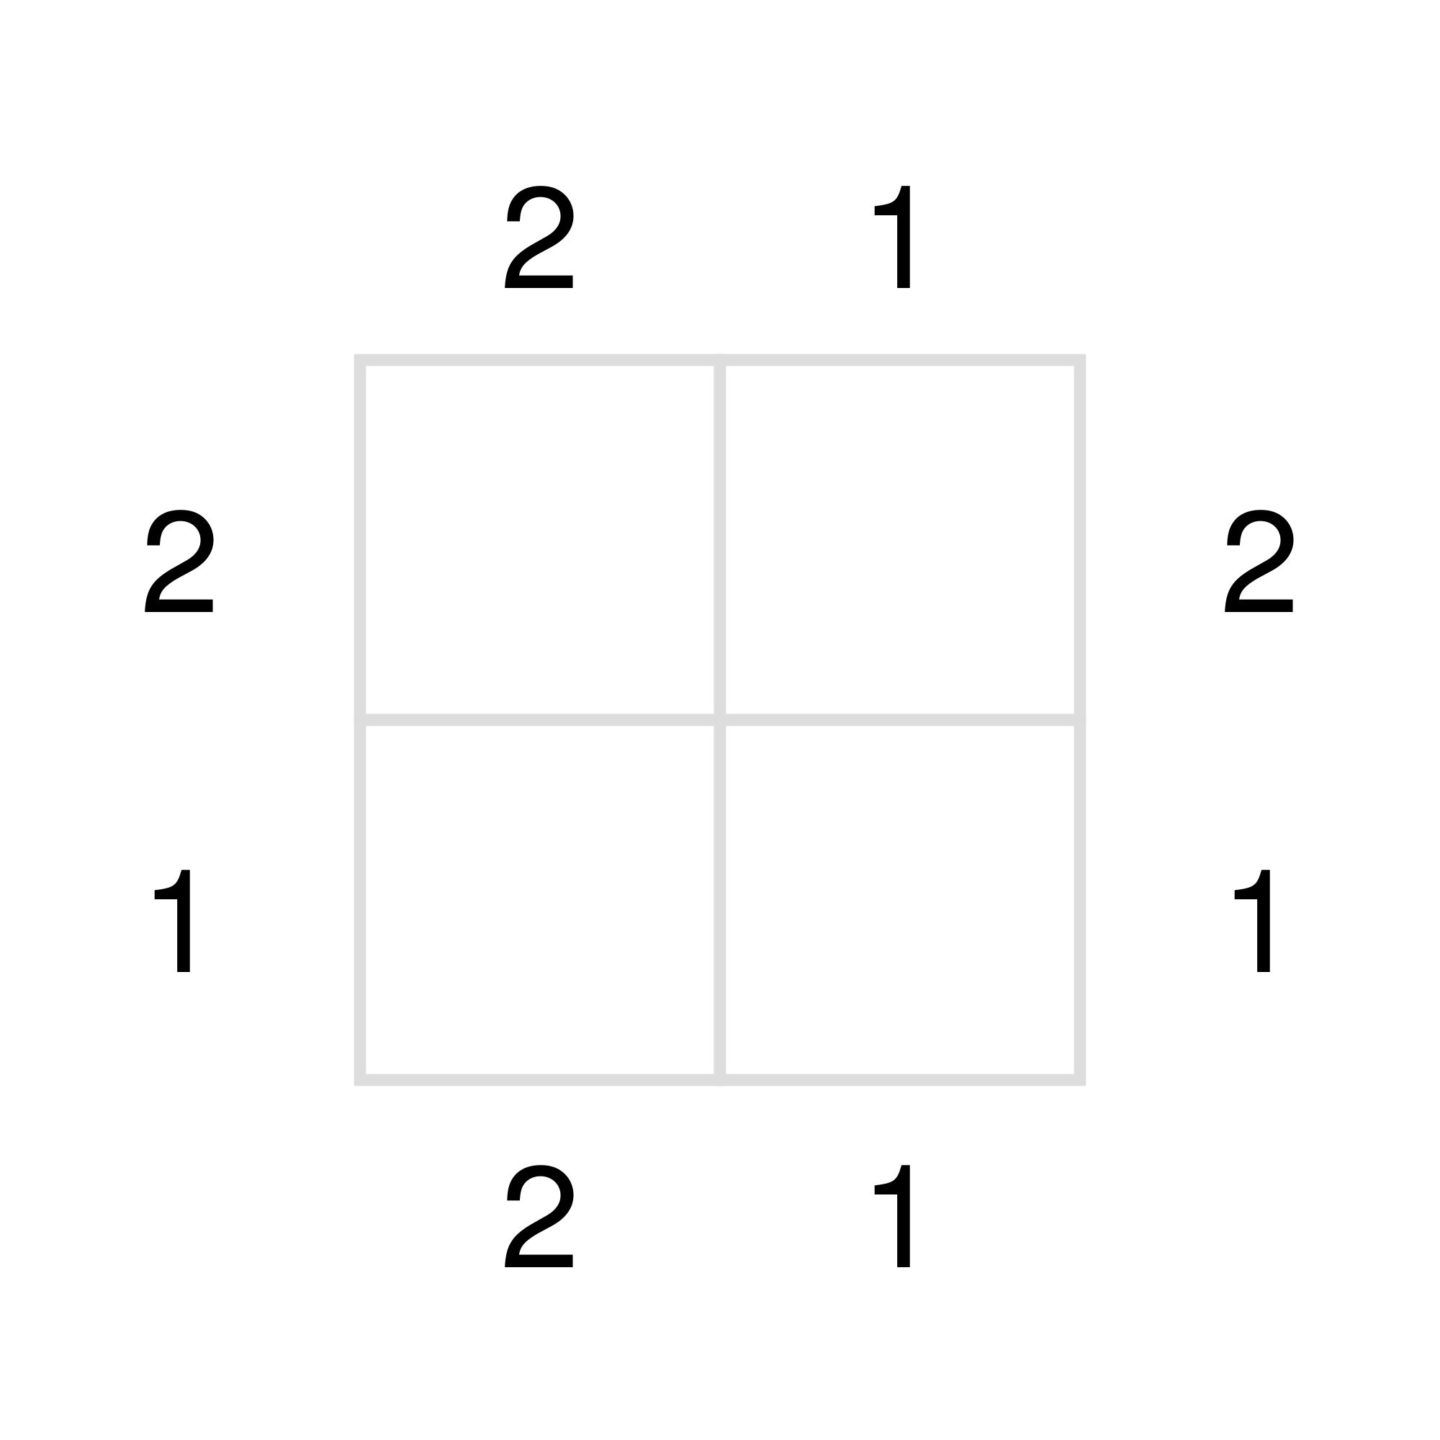
Look at row 1 below the very first ‘block’ remember to read from right to left, the first grey line you see is classed as 1dc, now inside your very first ‘block’ you would have 2dc, the middle grey line you see still working on row 1 will be classed as another dc stitch so that means you have 4dc altogether – 1dc at the start, 2dc in the middle and 1dc at the end which in this case for instance finishes in the middle as we have two ‘blocks’ in our picture below.
Because we have two ‘blocks’ in our picture the 1dc that finishes in the middle is shared with the second ‘block’ so we don’t count that center dc again – so we have 4dc altogether from the first ‘block’ then in the second ‘block’ still working on row 1 we would put 2dc in the middle and 1dc at the end which is our last grey line. Altogether we have 7dc for two ‘blocks’ on row 1 below.

Now i know that is a lot of information to take all in at once. You just have to think each row consists of ‘blocks’, each ‘block’ is either open or solid. Solid ‘blocks’ are filled with 4dc stitches and open ‘blocks’ are your ch2 spaces. Each ‘block’ shares a solid line with the ‘block’ next to it meaning the last stitch of the first ‘block’ is the first stitch of the next ‘block’. So when you have two ‘blocks’ next to each other you don’t have 8dc you have 7dc because of the dc the ‘block’ shares. Each ‘block’ has 4dc stitches but they always share the middle one.
Practice Chart:
Here is a practice chart below, the picture shows the grey ‘blocks’ are your dc’s and the white ‘blocks’ are your ch2 spaces – this is the same in my paid PDF blanket pattern charts.
Reading the numbers along the bottom and the top you can see you have five ‘blocks’.
With a little math you do a sum of 3dc x 5 blocks = 15dc + 1dc (remember they share a center dc which is the 4th dc) = 16dc
R1. So the sum above tells you for this pattern you would need 16dc altogether, so you would ch17 for your starting ch and place 1dc in 2nd ch from hook and in each ch and at the end this will give you 16dc altogether to start your pattern below which also means row 1 is complete.
R2. Ch1, 1dc in first 4dc, ch2, skip next 2dc, 1dc in next 4dc, ch2, skip next 2dc, 1dc in last 4dc, turn (16sts)
R3. Ch1, 1dc in first 4dc, 2dc in ch2 space, 1dc in next 4dc, 2dc in ch2 space, 1dc in last 4dc, turn (16dc)
R4. Ch1, 1dc in first 4dc, ch2, skip next 2dc, 1dc in next 4dc, ch2, skip next 2dc, 1dc in last 4dc, turn (16sts)
R5. Ch1, 1dc in first 4dc, 2dc in ch2 space, 1dc in next 4dc, 2dc in ch2 space, 1dc in last 4dc (16dc)
Fasten off.
You have now completed your first filet crochet chart! Go you!!

Making Patterns Larger:
As we spoke above you need to do a little math to make patterns larger, so as an example if you wanted to make the chart above larger in width here is the math for it:
We only want to repeat ‘blocks’ 2-5 above so it will be in a repeating pattern, always do 3dc x however many blocks you want. We always want to start with a solid ‘block’ and end with a solid ‘block’.
Lets say we wanted to repeat it one more time: We repeat ‘blocks’ 1-5 first then repeat ‘blocks’ 2-5 which is 9 ‘blocks’ altogether.
3dc x 9 blocks altogether = 27dc + 1dc (remember they share a center dc which is the 4th dc) = 28dc altogether – Remember to ch29 for your starting chain and put the first dc in 2nd ch from hook
Now lets say we wanted to repeat it two more times: We repeat ‘blocks’ 1-5 first then repeat ‘blocks’ 2-5 two more times which is 13 ‘blocks’ altogether.
3dc x 13 blocks = 39dc + 1dc (remember they share a center dc which is the 4th dc) = 40dc altogether – Remember to ch41 for your starting chain and put the first dc in 2nd ch from hook
Now this method can be applied for all my blanket chart patterns if you have purchased the PDF version as you will be able to see where the ‘blocks’ are and where the ‘spaces’ are.
Good Luck!
