If there’s one stitch that adds instant texture and squishiness to your crochet projects, it’s the puff stitch! Scroll down for the free stitch pattern BELOW!
The Puffy, Fluffy, Oh-So-Cozy Puff Stitch!
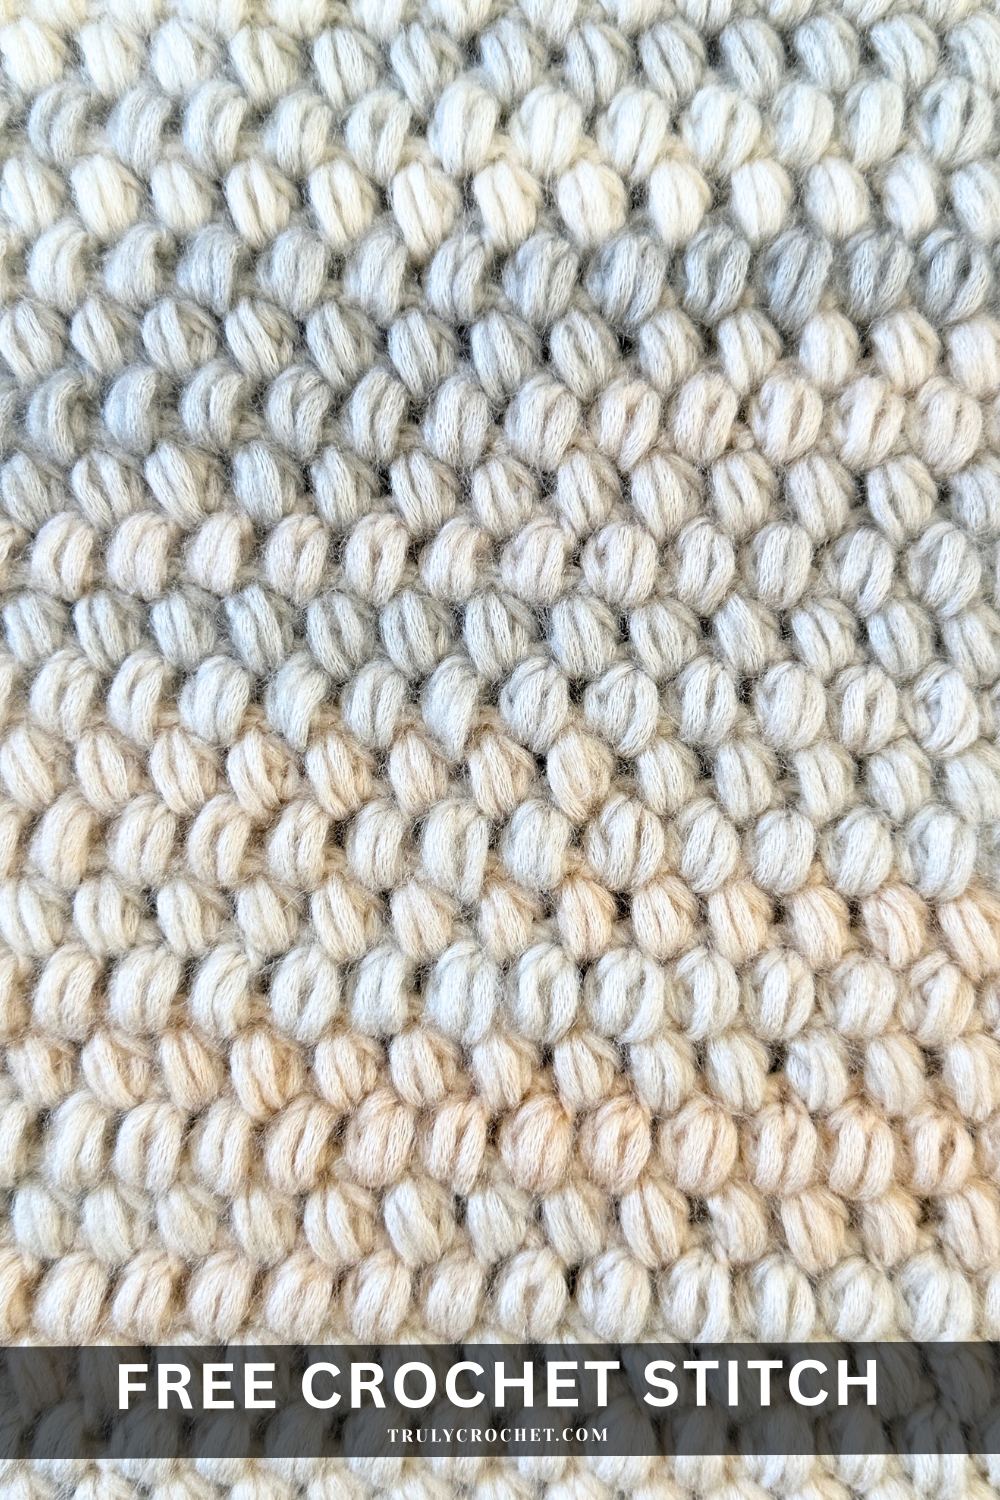
If there’s one stitch that adds instant texture and squishiness to your crochet projects, it’s the puff stitch! This stitch is like a tiny, fluffy cloud worked right into your fabric soft, cozy, and oh-so-satisfying to make. Whether you’re adding it to a blanket, scarf, or even a cute amigurumi, the puff stitch brings a delightful, bouncy effect to any design.
What Is the Puff Stitch?
The puff stitch is a textured crochet stitch that creates a raised, puffy effect. It’s similar to a bobble stitch, but it’s softer and less structured, making it perfect for adding a bit of fluff without too much bulk.
Why You’ll Love It
- Super Squishy – Perfect for blankets, sweaters, and anything that needs an extra dose of coziness.
- Great for Texture – Adds a unique look and feel to your projects.
- Beginner-Friendly – Once you get the hang of it, it’s easy to incorporate into any design.
How to Crochet the Puff Stitch
Ready to give it a try? Here’s a simple step-by-step guide:
- Yarn over and insert your hook into the stitch where you want the puff.
- Yarn over again and pull up a loop. (You now have 2 loops on your hook.)
- Repeat yarn over, insert, and pull up a loop 3-5 more times, until you have a nice bunch of loops on your hook – For this crochet stitch you will want 7 loops on your hook.
- Yarn over and pull through all the loops at once.
Tips for Perfect Puff Stitches
- Use a soft, fluffy yarn for extra puffiness!
- Keep your tension loose so your stitches stay nice and airy.
- Experiment with different heights by adding more loops before pulling through.
Fun Ways to Use the Puff Stitch
- Blankets – Make a snuggly, textured throw.
- Hats & Scarves – Add warmth and style to your winter wear.
- Amigurumi – Give soft, plush textures to your crochet toys.
- Borders & Edging – Create a decorative touch to your projects.
So, are you ready to puff it up? Try adding this stitch to your next project and enjoy the extra fluffiness! Happy crocheting!
How To Crochet The Puff Stitch
Stitches broken down into easy steps:
Ch – Chain
- Make a slip knot, insert your hook into the slip knot loop.
- Yarn over and pull up a new loop.
- The first chain stitch is now complete.
- Keep repeating the above steps to make the next chain stitch and the rest of the foundation chain.
Puff St – Puff Stitch
- Yarn over, insert your hook into the indicated stitch. Yarn over and pull up a loop. (You will have 3 loops on your hook.)
- Yarn over, insert your hook into the same stitch, and pull up a loop. (5 loops on your hook.)
- Yarn over, insert your hook into the same stitch, and pull up a loop. (7 loops on your hook.)
- Yarn over and pull through all 7 loops on your hook.
Written In:
This pattern is written using American standard crochet terminology.
Notes:
- This crochet pattern is worked in rows starting from the bottom working towards the top, turn your piece over at the end of each row.
- Ch2 at the start of each row does not count as a stitch throughout the pattern.
- Repeat what is in between the stars from * to * until the end of the round.
- If you have a ** in your row you need to follow the pattern from * to * across the entire row and then when you get near the end of the row you will finish your last repeat at ** because you can no longer complete the entire repeat then follow what it says to do to complete the row.
- Read each row carefully before starting the row.
Multiples:
- 2 + 4
Yarn & Hook:
- 4mm Crochet Hook
- Caron Blossom Cakes
Written Instructions for the Puff Stitch:
- You can find my other free crochet stitches here.
- Save this tutorial to your Pinterest crochet board here.
Need visual help? Join our Crochet Stitch Club – 7 day FREE trial!
Written Instructions for the Puff Stitch:
R1. Chain your desired width using the multiples above, Work a puff st in the 4th ch from the hook, ch1 * Skip next ch, puff st in next ch, ch1 * Repeat from * to * all the way across the row, turn
R2. Ch2, Work a (puff st, ch1) in each ch1 space across skipping all puff stitches, work your last (puff st, ch1) between the last puff st and the turning chain from row 1, turn
R3. Ch2, Work a (puff st, ch1) in each ch1 space across skipping all puff stitches, work your last (puff st, ch1) between the last puff st and the ch2 turning chain from the previous row, turn
Repeat row 3 until you reach your desired length.
Fasten off and weave in ends.
More Crochet Stitch Tutorials
If you liked this article, you might be interested in these related crochet stitch tutorials:
Where To Next?
Pin this post: Save this tutorial to your Pinterest boards so that you can come back to it later.
Leave a comment: Leave a comment below, we love to hear your feedback!
Share on Instagram: When you make this project, share it on social media and tag me @trulycrochet. We love to see what you are currently making!
Terms Of Use:
These Terms of Use apply to all the patterns and tutorials made by Truly Crochet. All of the patterns and tutorials are for personal use only and belong to Truly Crochet.
- You are not allowed to copy, reproduce, adjust, distribute or sell Truly Crochet patterns and tutorials in whole or in part.
- You are not allowed to distribute and/or sell the translations of Truly Crochet patterns and tutorials in whole or in part.
- You can sell finished items made using Truly Crochet patterns, however, you have to give credit to Truly Crochet for the actual design.
- You are not allowed to use Truly Crochet photos without written permission.
- You are not allowed to copy and paste Truly Crochet patterns or tutorials to social media or anywhere else in whole or in part.
- If you would like to share the patterns, you can give a link to the Truly Crochet website www.trulycrochet.com.

